
Easy DIY Christmas Decor: Upcycled Pallet | Painted Christmas Trees
This DIY Christmas Decor is easy to make and oh-so-cute! I always love DIY crafts using upcycled pallets and this one is perfect for adding a festive flair to any corner, wall, or even outside the front door.

DIY Christmas Decor: Upcycled Pallet Painted Christmas Trees
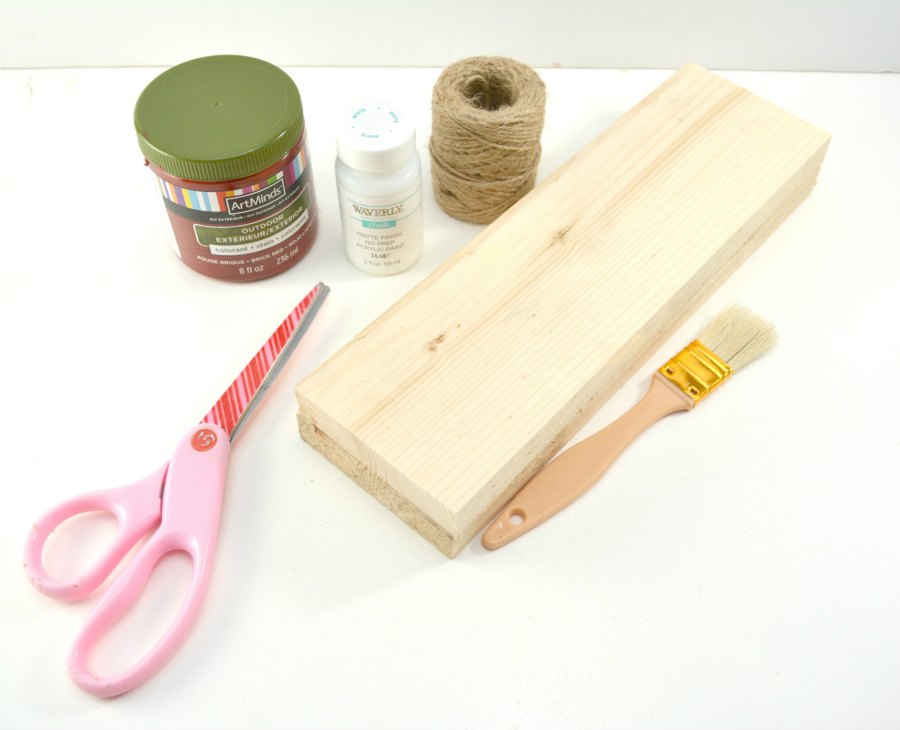
SUPPLIES YOU WILL NEED TO MAKE YOUR OWN DIY CHRISTMAS DECOR – UPCYCLED PALLET PAINTED TREES
Pallet wood – if you aren’t able to find the 1-foot pieces, a 1×3 or 1×4 works best
A hand or electric saw – if you needed to use the 1×3 or 1×4 and didn’t have it cut at the hardware store, you’ll need to cut them yourself
Red wood stain – any kind of indoor/outdoor wood stain should work. You can choose a darker, more maroon color or a brighter barn color – whichever works best for your decor.
Paintbrushes – you’ll want to grab brushes that work well with stain for this project
White chalk paint – you won’t need a whole lot of this, so a small can or jar should do it
Large star stickers – you could even use one with glitter if you’re feeling extra fancy
Twine – get one that is a little thicker and more rustic looking
HOW TO MAKE THIS GORGEOUS DIY CHRISTMAS DECOR PALLET PAINTED TREES PLAQUE
If you weren’t able to get precut wood pieces, begin by cutting three equal pieces of pallet wood. Wood that is 1×3 or 1×4 works best for this project. We used a 1×4 and cut it into 3 pieces that were 12 inches long each. You can mark this with a ruler and use a simple hand saw if you do not have an electric saw.
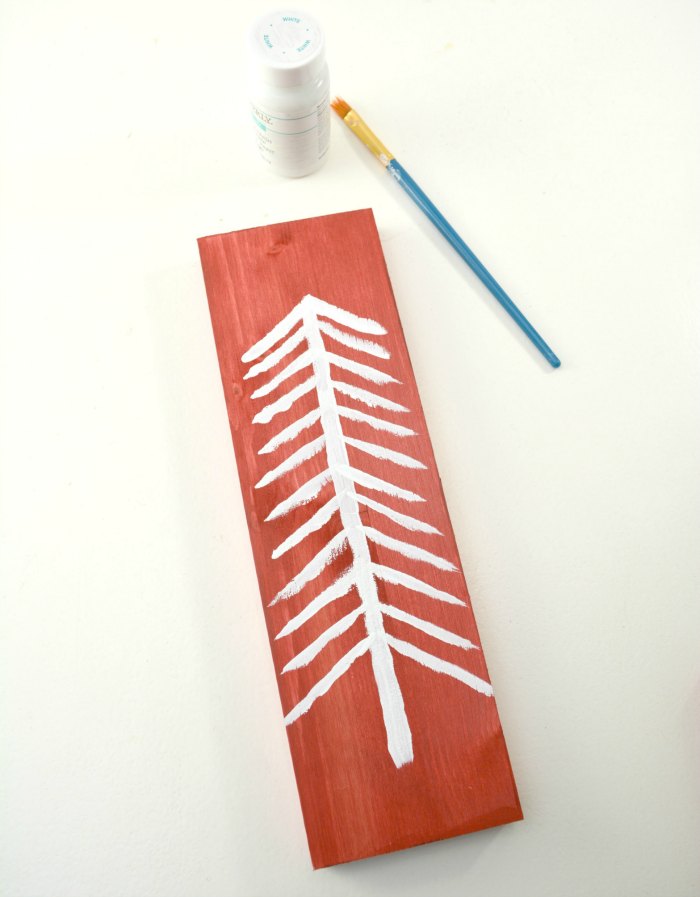
Next, paint each piece of cut pallet wood with a layer of red wood stain. Let the stain sit on the wood for a minute or two, and then wipe off with a clean rag or paper towel in one smooth motion. You can also leave it to dry as is without wiping any off, but it will look more like a paint than a stain in that case. Both look great, it just comes down to your personal preference. Once you have painted the front and sides of each board, let them dry completely.

With the pallet boards dry, lay them on a flat surface and begin painting different Christmas tree designs on the front of each one. We used white chalk paint because it dries quickly, but you can use any craft paint you have on hand. View the photo for inspiration on how to make each of your trees. Leave a few inches between the top of each tree and the edge of the piece of wood. This is where your star and twine will go.
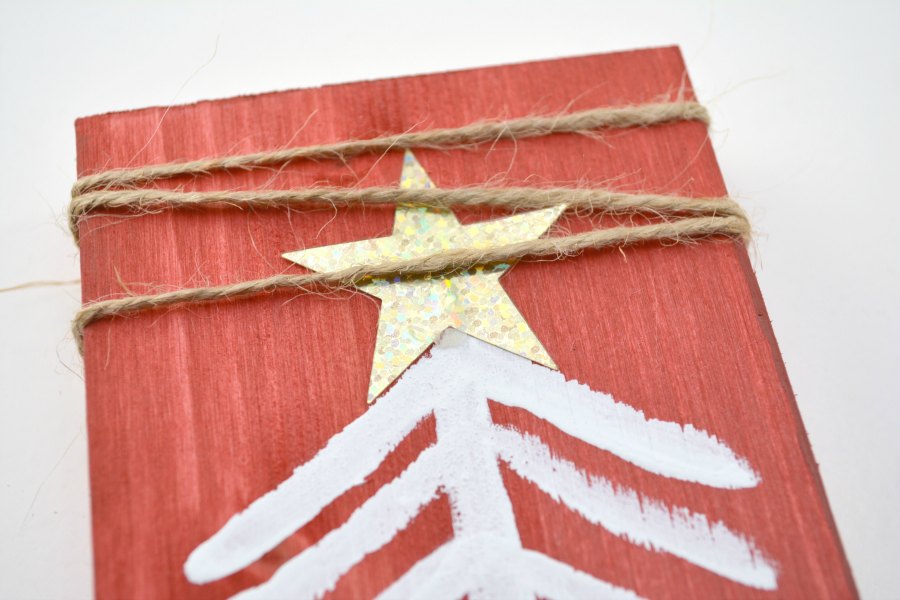
When the chalk paint has dried, hot glue or stick a large confetti star shape or sticker on the top of each tree. Cut a length of twine and wrap it around the top of each piece of pallet wood. You can do this any way you like. The twine can overlap and even cross over the star shape at the top of your tree. Secure the ends of the twine on the back of each pallet wood piece with hot glue.
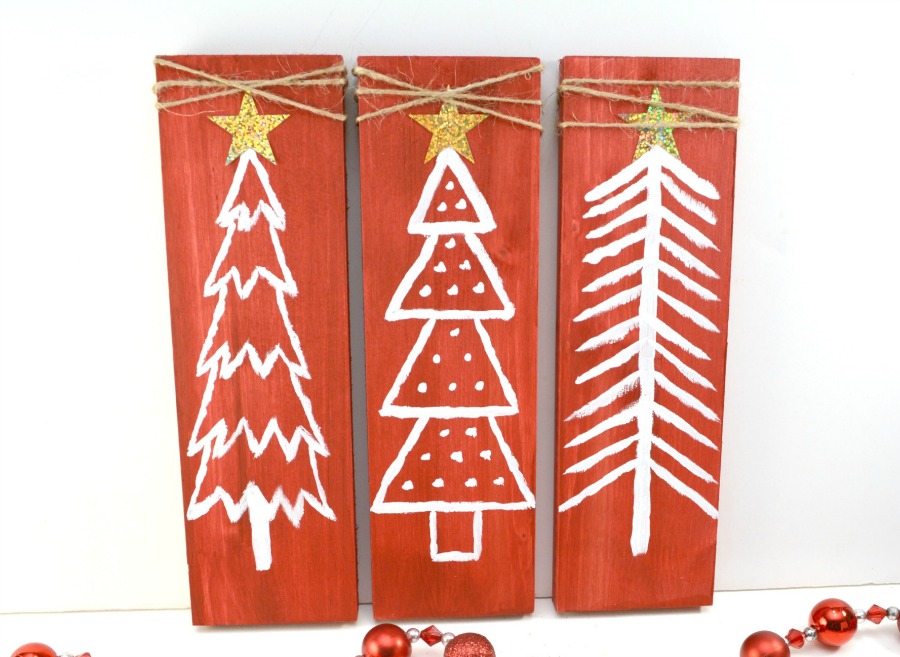
Voila – you have your DIY Christmas home decor all set to put wherever you’d like to add a little holiday cheer!


that is such a great idea! These are proof that you don’t need something shiny to have great Christmas decor. I have to make some of these!
DIY pallet anythings have been quite popular lately! I love these trees! Simple to build.
Love this, inexpensive and something I can do with my teens which is always a bonus.
These are too cute! Great job on the artwork. I think these would make for wonderful decorations.
This is such a cute idea! I love to do fun projects like this with my son. He will love to help me paint Christmas scenes on pallet wood.
This is such a cute craft. I actually have a pallet in my garage that would be perfect for this.
I love this craft idea! I think we still have some pallets in the shed. This would make for a fun winter break craft for the family to do together.
Oh my gosh this is so so fun!! and totally easy too!
What a great idea! These came out so great!
These are really fun ideas. I love that the kids can help with these!
These are perfect for a night in. I like the idea of up cycling old wood for fun.
I love the rustic, country feel of this design! It’s definitely something that I’d try to recreate at home since I like making my own decorations for the season!
These craft would make good use of the pallets I would normally just throw out. Thanks for the idea. My boys can help me with this. It will keep them away from their gadgets for a while and that’s good.
These pallet trees are looking nice. Amazing DIY